Showing posts with label Malay. Show all posts

Thursday, 24 September 2015

Bingka Cempedak

Eid Mubarak to all Muslim readers. Looks like the primary & secondary school kids in Singapore will have another long weekend as schools will be closed tomorrow due to the worsening haze... This is the first time we have to close the schools because of the haze as the last time we experienced a hazardous level was during the June holidays two years ago.  If this unhealthy level continues, it's going to cause a high level of anxiety for schools since the major exams are around the corner. So let's hope this haze will go away soon....


So I baked this bingka cempedak this morning. It was really a last minute decision... Was looking through my recipe file & decided to try the recipe shared by Aini Salim. Another great recipe by Mdm Aini... I didn't change any of the ingredients in the recipe & after baking it, I don't think there's a need to change any.


Bingka Cempedak
Ingredients:
300g cempedak flesh (pureed)
240g plain flour
2 eggs
650g coconut milk (I used 250g thick coconut milk + 400g water.)
150g sugar (You may reduce if the cempedak is already very sweet.)
80g butter (melted)
1/2 tsp orange colouring (optional) - I didn't use.
1/2 salt

Method:
  1. Grease a baking pan (20x20x7cm) & line with grease paper. Then grease the paper. Preheat oven at 160 deg C.
  2. Combine cempedak, coconut milk, sugar & blend until well mixed.
  3. Add in flour & eggs & continue to blend until well mixed. Strain.
  4. Add in melted butter, salt & colouring (if using). Mix well.
  5. Pour the batter into the pan & bake for 30-40 minutes. 
Recipe by Aini Salim.
Source: Berita Harian (Singapore) 27 April 2007.

Notes & modifications:
  1. I used a jug blender to mix the batter.
  2. I baked using 2 Nordicware pans as shown above & a mini muffin pan, yielding 65 pieces. I greased the pans with cooking oil before pouring the batter.

Sunday, 23 August 2015

Serimuka (Putri Salat) Durian

I made Putri Salat (or Serimuka to the Malaysians) for dessert at my mum's place last weekend. I decided to add the beautiful yellow but pricey durian (I think it was Mao Shan Wang.) which I bought at the market a couple of days before....  This sure is a perfect dessert for all who love kuih & durian like me... Excellent recipe too, except I think the top layer is too thick.... will reduce it by a third the next time I make this.


Serimuka (Putri Salat) Durian
GLUTINOUS RICE LAYER
Ingredients:
500g glutinous rice - soak in water plus 1 tsp lime solution (air kapur) for 1 hour (I didn't add the lime water.)
1 tsp salt
1 tsp sugar
340 ml thin (diluted) coconut milk
pandan leaf (torn & tied into a knot)

Method:
  1. Rinse rice until clean & strain. Combine rice, salt, sugar, pandan leaf & coconut milk. Steam for about 45 minutes until cooked. (In the meantime, start preparing the durian kaya layer.)
  2. Then fluff rice using a folk & transfer into a greased pan. Press the rice using banana leaf, plastic or lapis cake presser. 
  3. Steam again for about 5 minutes, just before pouring the durian kaya.
DURIAN KAYA LAYER
Ingredients:
300g durian flesh
250g fine granulated sugar
6 whole eggs (about 60g each)
70g plain flour 
20g sago or corn flour 
750ml thick coconut milk (The original recipe recommends using 200 ml coconut milk plus 550 ml water.) - I followed Rima by combining 350 ml coconut milk from a box with 400ml water.
a pinch of salt
a few drops of yellow colouring

Method:
  1. Blend durian flesh & about 100ml of the (750ml) coconut milk until it turns into durian puree. Set aside.
  2. Beat eggs & sugar until the sugar dissolves. Add in flours, salt & colouring. Then pour in the rest of coconut milk gradually. Stir until well combined. Then strain the mixture.
  3. Add in the durian puree into the egg mixture & mix thoroughly. Cook the mixture on a stove using medium low fire, stirring continuously until it thickens slightly but not boiling.
  4. Using a folk, scratch the surface of the pressed glutinous layer lightly & pour the cooked kaya mixture onto it. Steam for about 30 minutes on medium low fire.
  5. Remove pan from steamer & leave the kuih in the pan to cool completely (about 3 hours) before cutting & serving.
Notes & modifications:
  1. I used a jug blender to mix my kaya mixture. After blending the durian with some coconut milk, I added the rest of the ingredients & continued to blend until well mixed. Then I strained the mixture.  
  2. Instead of cooking the kaya directly on the stove, I double-boiled it like I usually do when melting chocolate block. This method lessens the chance of the kaya sticking to the pot easily.
  3. I used a 9x9-inch square pan. This is equivalent to a 10-inch round pan. I lined the pan with a silicone paper. You can line with a piece of plastic or just grease it.
  4. Like any kuih, slice using a plastic knife to produce smooth cut surface.
Original recipe by Rossya.
Adapted by Bisousatoi.

Sunday, 7 June 2015

Apam Solo

Last Sunday, I made a day trip to Shah Alam to visit the family of my cousin who passed away after battling cancer for about one and a half years. My heart goes out to his family, especially his wife and five young sons. May Allah give them the strength and patience to get through this tragic time. Ameen..


Right after the afternoon prayers, a prayer session (tahlil) for my late cousin was held. Besides family and friends, the neighbours, including the neighbourhood imam, were also present. What strikes me, from my observation and feedback from my cousins, is the community spirit of gotong-royong which is so much alive although the neighbourhood is relatively new and, I believe, majority of the residents are young families. That helped my late cousin's family a lot as both of them are quite new to the area. My cousin was a Singaporean who, before receiving treatment for his cancer in Kuala Lumpur, was working in Singapore and travelled up north every weekend to join his family. His wife who is from the East Coast works in Shah Alam and looks after the five sons. Soon after the neighbours received news of my cousin's passing, a few neighbours approached and informed his family that they would help with the funeral arrangement. They also helped with the tahlil sessions for several days, including the preparation of food. 


For the tahlil session on Sunday, a type of apam with red bean filling was served. I had not eaten that type of apam before, so when I first tasted it, I liked it a lot as it not only tasted good but it also looked pretty. After googling for the recipe on my return to Singapore, I found out that it is called Apam Bengawan Solo or just Apam Solo. It tastes somewhat like pau except that it's softer and spongier as the batter is quite watery. I would highly recommend you to try this recipe especially if you like traditional kuih. 


Apam Solo

COCONUT FILLING

Ingredients:
70g palm sugar
15g sugar
70 ml water
1 pandan leaf, torn
150g freshly-grated coconut
1/2 tbsp plain flour
1/8 tsp salt

Method:
1.     Combine palm sugar, sugar, water & pandan leaves in a saucepan until the syrup reaches a boil.
2.     Add in grated coconut & salt. Mix thoroughly.
3.     When the mixture is almost dry, add in flour & mix well.
4.     Remove from fire & leave to cool. Remove the pandan leaf before using the filling.

BATTER

Ingredients:
250g plain flour
1 tsp instant yeast
90g granulated sugar
125 ml evaporated milk
300 ml water
a pinch of salt
colouring - I used red & green.

Method:
  1. Combine all ingredients except colouring & mix until well-blended. Then strain the batter.
  2. Divide batter into 3 parts. Leave 1 part plain, colour 1 part red & the  other green. Cover & leave to rise for about 40 minutes.
  3. In the meantime, grease moulds. Divide the filling & form into small balls. I divided into balls of 4g each. Set aside.
  4. Prepare steamer. Pour the plain batter into the moulds. Put filling & then pour the red & green batter to the brim. Do until finish.
  5. Steam on medium fire for about 15-20 minutes.
  6. Remove from steamer & leave to cool. Once cooled,  remove the apam from the moulds.
Adapted from recipe shared by Seri Kandi Tanah Jauhar.

Notes:
  1. The above recipe is half the recipe shared by Sk & it yields about 50 small pieces.
  2. Besides coconut filling, you can also use red bean or savoury filling.
  3. Since I used a small steamer, I had to steam the apam in a few batches. As a result, the last batch didn't turn out pretty as the center of the apam sank after it's removed from the steamer. I think the batter might have been overproofed. So my advice is you steam the apam in just one or two batches.

Monday, 27 April 2015

Lepat Ubi (Steamed Tapioca Cake)

After making Bengkang Ubi Kayu three weeks ago, I froze the remaining grated tapioca. Then last Saturday, I decided to use it up & make Lepat Ubi, a traditional steamed cake. Just love this kuih.... it's soft & gooey with just enough sweetness & richness. To top it off, there's the mild flavour & fragrance of the banana leaf which makes this kuih a delectable treat.


Lepat Pisang

Ingredients:
80g gula Melaka (palm sugar)
40g water
1 pandan leaf (torn)
400g grated raw tapioca
100g thick coconut milk
2 tbsp dark brown/black sugar (gula timbang)
1/2 tsp salt
banana leaves (softened & cut into rectangles)

Method:
  1. Prepare a steamer.
  2. Combine gula Melaka, water & pandan leaf in a small pot & cook until the gula Melaka melts. Strain & leave the syrup aside to cool.
  3. Combine tapioca, coconut milk, brown/black sugar, salt & gula Melaka syrup. Mix well.
  4. Take a piece of banana leaf & place some mixture on it, at the center. Fold the leaf in thirds, then fold the two ends. Place on a steamer. Do the same to the rest of mixture until finish.
  5. Steam on medium fire for about 30 minutes. Leave to cool before serving.
Notes:
  1. I defrost the frozen grated tapioca completely before mixing it with the other ingredients.
  2. To soften the banana leaf, wash & wipe the leaf dry. Then pass the leaf over direct fire until the leave is soft.
  3. Once you have mixed all the ingredients, you may taste it & adjust the amount of sugar accordingly.

Wednesday, 8 April 2015

Bengkang Ubi Kayu (Tapioca Cake)

I accompanied my mum to the wet market in Bedok last Friday. One thing I like about the wet market is that things are generally much cheaper there than those from my neighbourhood market. There's also a stall that sells freshly-grated tapioca, something that's not sold in all markets. So I bought 1 kg of the grated tapioca, even though I had no plans to make anything with grated tapioca. I also bought a couple kilos of pisang tanduk with which I made banana chips.


Every time I think of what to make with grated tapioca, I always end up making some traditional kuih. Honestly, I can't think of anything else. This time, I decided to try a recipe from a book by Mdm Hasma Noor Basir. As I looked through her book, her beautiful Bengkang Ubi Kayu really tempted me into baking it. As you can see, the kuih is so beautiful...... It tastes great too, not overly sweet or rich. The only thing I would change is, I would add about 50 ml more coconut milk or water as I like my kuih to be softer.


Bengkang Ubi Kayu (Tapioca Cake)

Ingredients:
270 ml coconut milk
500g grated & strained tapioca
2 tsp tapioca or sago flour
160g granulated sugar
1 tsp coconut powder or milk powder
1 egg
10g butter or margarine
1/4 tsp salt
1/2 tsp pure vanilla extract (I added.)
a few drops of yellow colour
butter for greasing the baking pan

Method:
  1. Combine all ingredients in a saucepan & mix until well blended. Then heat up the mixture on a stove over low fire. Keep stirring & cook until the mixture becomes thick.
  2. Pour the mixture into a greased baking pan measuring 6x6 inch.
  3. Bake in a preheated oven at 180 deg C for about 45 minutes or until the cake turns golden brown.
  4. Leave the cake in the pan to cool completely. Remove the cake from the pan & slice using a plastic knife.
Notes:
  1. The above recipe is just 1/3 of the recipe in the book.
  2. I lined the bottom & sides of my baking pan with a piece of aluminium foil, leaving it to overhang from the pan. Then I greased the aluminium foil before pouring in the mixture. To remove the cake from the pan, I just lifted the aluminium foil.
  3. I baked the cake for 45 minutes using top & bottom fire. Then, I left it to continue baking for another 5 minutes using only the top fire.
Adapted from Talam Klasik Malaysia by Mdm Hasma Noor Basir.

Tuesday, 31 March 2015

Banana Chips aka Kerepek Pisang

It's already the end of the month. This means that it is almost the end of the LTU event which I'm hosting. So my last entry for the event is about my attempt at making the addictive Banana Chips, also known as Kerepek Pisang.


Kerepek pisang brings back memories of my younger days... To supplement the family income, my parents made kerepek pisang at home & supply it to shops & snack stalls at the market. My mum would use a huge kuali into which bottles of oil were poured. She would fry the chips while my father & I helped to pack them. Now, my mum still fries the chips but only for home consumption. 


My family loves snacking on kerepek pisang but we usually just buy the ready made ones since it's so widely available in shops & markets.  Last week's attempt was really my first time frying the chips myself. I wanted to use pisang tanduk but since I could not find any green ones, I decided to use pisang kepok/nipah instead. I think pisang tanduk  tastes so much better.


Update (5 April 2015):
I managed to find some green pisang tanduk on Friday. Below is a shot of the pisang tanduk chips. Not only do the bright yellow chips look prettier but also taste better! 


Banana Chips a.k.a. Kerepek Pisang

Ingredients:
bananas (young & green)
salt
water
vegetable oil for deep frying

Method:
  1. Peel the bananas. Set aside.
  2. Mix salt & water. Set aside.
  3. Heat up the oil in a deep frying pan or kuali.
  4. Using a handheld vegetable slicer, slice bananas directly into the hot oil.
  5. Sprinkle a few tsps of salt solution onto the sliced bananas.
  6. Fry until crispy.
  7. Leave to cool completely. Then store in an airtight container.
Notes:
  1. I've not included the amount for the ingredients used as I think you can just estimate it.
  2. I used pisang kepok/nipah. You may also use pisang tanduk, another preferred type of banana when making banana chips. I prefer the taste of pisang tanduk.
  3. The amount of salt & water needed will depend on your preference & the amount of bananas.

Wednesday, 17 December 2014

Serimuka or Puteri Salat Batik

Last Saturday, my siblings & their families gathered for dinner at my place, & for dessert, I decided to make an all-time favourite kuih, Putri Salat aka Serimuka. This time,  I decided to use the recipe shared by Ayu. This recipe uses both white & black glutinous as the base which I think is interesting. For the custard layer, I also did what my mum usually does whenever she makes her putri salat, I added some spices to enhance the flavour & fragrance..... 


Initially, I wanted to make just half the recipe as I was afraid that we would have to keep eating the kuih for the rest of the week. I'm glad I decided to go for the whole recipe. The kuih was a big hit... the siblings even asked some for tapau... heheThere was some left, so I served it to my aunts & cousins who dropped by on Sunday. They gladly cleaned up the plate... as a cousin commented, "Sedap eh kuih ni...." (This kuih is so good eh...) Haha! Seriously, this kuih is really sedap! Thank you Ayu for sharing this & many other delicious kuih recipes! 


Serimuka or Puteri Salat Batik

BOTTOM LAYER
Ingredients:
100g black glutinous rice
400g white glutinous rice
300 ml thick coconut milk
1 tbsp sugar
1tsp salt
250 ml water (I only used about 100ml.)
2 pandan leaves (torn lengthwise)

Method:
  1. Wash the black glutinous rice. Drain & place it in a container. Pour some water until about 3 cm above the rice. Leave aside to soak for at least 3 hours. Separately, wash the white glutinous rice & place it in another container. Pour some water until about 3 cm above the rice. Leave aside to soak for at least 3 hours. 
  2. Pour the black rice & water into a pot & cook until it's soft. Stir frequently to prevent burning. If the water dries up while the rice is still not cooked, add more water & continue cooking. Once cooked, remove from fire & drain the water. Set aside.
  3. Prepare a steamer & heat it up on medium-low fire.
  4. Line a 9x9-inch pan (The original recipe uses 10x10-inch pan.) with plastic or silicone paper. Combine the white glutinous rice, coconut milk, sugar & salt in the lined pan. Then pour the water until the rice is just covered, about 2 mm above the rice. So, you need NOT use all the 250ml water. I only used about 100ml. Stir the mixture, throw in the pandan leaves & steam for about 30 minutes or until cooked. (At this point, you may start mixing the top layer.)
  5. Remove the pan from the steamer. Pick out the pandan leaves & stir the cooked white rice for a bit. Mix in the black rice & press it down with a lapis legit presser or the back of a metal spoon. Ensure that the rice layer is very compact, especially around the edges and corners. Place the pan into the steamer & continue steaming it on medium-low fire. Top up the water in it if necessary. (At this point, you may start cooking the top layer.)

TOP LAYER
Ingredients:
A
250g castor sugar
100g custard flour (I used cornflour.)
400 ml thick coconut milk
400 ml water
10-20 pandan leaves (mash with some water using a mortar and pestle or blend with part or all of the 400ml water above.)
1 tsp fennel seeds (crushed)
5 cardamom pods (crush the seeds)

B
4 eggs
1/2 tsp fine salt
green & yellow colouring (The original recipe uses only green.)

Method:
  1. Combine ingredients A in a bowl & mix with a hand whisk, making sure the sugar has dissolved. Add in ingredients B & continue mixing until well blended,  
  2. Strain the mixture, preferably using a cheesecloth, into a pot. Cook on low fire until the mixture starts to thicken, about 3 minutes. 
  3. Very gently, pour the custard onto the rice layer & steam for about 30 minutes on low fire.
  4. Remove from the steamer & allow to cool completely for about 4-6 hours. Cut using a plastic knife.
Notes & modifications:
  1. The original recipe does not use fennel seeds & cardamom. You may omit them & just stick to the pandan leaves. The original recipe also added 1/2 tsp of pandan essence.
  2. Start preparing the top layer once you have placed the white rice in the steamer (step 4 for bottom layer) but, do not cook the custard (step 2 for the top layer) until you have pressed the rice & placed the pan in the steamer (step 5 for bottom layer).
  3. You may wrap the steamer cover with a large towel to catch any condensation which might otherwise drip onto the surface of the kuih. I didn't do this. I just dabbed the surface with a kitchen paper towel. You may also use a damp kitchen towel.
Adapted from Curlybabe's Satisfaction. 
Original recipe by Chef Asma.

Wednesday, 19 November 2014

Satay Pau

Yesterday, I posted my Satay Buns entry.  This morning, I'm posting another satay-based finger food, Satay Pau. I used the same satay filling recipe & the dough recipe was one which I got from a weekend class more than ten years ago. I've not used this recipe for many years. At first, I wanted to try the recipe used by Victoria, but hers involves 3 days of preparation. For me, that really needs a lot of planning. So I decided to use this recipe which just required 2 days of preparation. Even then, I had to throw the first starter dough after it was left to ferment for more than 24 hours as I had to make an unscheduled trip to Johor to attend my hubby's uncle's funeral.


The idea to use satay filling came after eating satay pau I bought in Malaysia recently. I love the combination, but the satay filling was too sweet to my liking. I know satay is supposed to taste sweet, but that was just too sweet. For this homemade pau, I decided to use my mum's satay recipe. This time, the filling is more moist than the one I made for my satay buns after adding some cornflour & water mixture. The dough is good too. The pau is soft & fluffy although denser than the commercial ones. Still, I like it a lot. The next pau recipe I'm going to try will be the one Victoria used, with chicken filling, of course.


Satay Pau

DOUGH
Starter
Ingredients:
140g Hong Kong flour
1/4 tsp double-acting baking powder
90g water
1/4 tsp instant yeast
Combine all the ingredients in a bowl & mix until well blended.  Cover & leave in room temperature to ferment for at least 16 hours, up to 24 hours.

Final Dough
Ingredients:
1 quantity of the above starter dough
200g Hong Kong flour
2 tsp double-acting baking powder
1/4 tsp ammonia (The one I bought from Phoon Huat is labelled as ammonium bicarbonate.)
85g fine sugar
45g tap water
1/4 tsp lye water or vinegar (I used vinegar.)
13g vegetable shortening (I used Crisco.)

Method:
  1. Combine flour, baking powder & ammonia & sift in a mixing bowl.
  2. Add in the starter dough, sugar, tap water & lye water or vinegar. Mix until just combined.
  3. Add in the vegetable shortening & continue mixing until well combined & a soft dough is formed. (I mixed it using my mixer using the dough hook for about 10 minutes.) Leave dough to rest for about 15 minutes.
  4. Divide rested dough into small balls. (I divided mine into 18 balls of 30g each.) Roll each dough into a disc. Spoon filling & pleat. Place the pau onto a piece of parchment paper. (I place each pau onto a small paper cupcake liner which has been flattened.) Do  the same with the rest of dough.  Steam on very high fire for about 15 minutes. (You DO NOT need to leave buns to proof before steaming.)
Recipe by Hamidah Rusdi, with some minor modifications.


BEEF SATAY FILLING
Ingredients:
200g ground beef
1 1/2 tbsp ground coriander seeds
1 1/2 tsp ground cumin
1/4 tsp tumeric powder
1/2 tsp salt (adjust to taste)
3 tbsp very dark brown sugar  - adjust amount based on your preference
1/8 cup ground toasted peanuts
1 tbsp tamarind juice
1 tbsp cooking oil
1tbsp cornflour + 3 tbsp water 

ground into paste
4 small red onions
1 clove garlic
2 cm galangal (lengkuas)
1 stalk lemongrass (white part only)

Method:
  1. Combine all the ingredients above, except oil & cornflour mixture, & mix thoroughly. Leave to marinate in the fridge for 1 hour. 
  2. After 1 hour, heat up the oil in a frying pan. Add in the meat mixture & stir frequently until it's cooked. (If the mixture is too dry when cooking, add some water.) Pour in the cornflour mixture & stir well. Transfer the cooked filling into a colander to drain any excess liquid. Leave to cool before wrapping in the dough.

Tuesday, 18 November 2014

Satay Buns

I've seen many bloggers baking soft buns, the kind that we Asians like. One of the recipes that has been making its rounds is the Kopitiam Milk Buns that was shared by Sonia. Besides the plain version, she also made use of this recipe to make some curry buns


Her curry buns inspired me to bake some filled buns. But I decided to fill mine with beef satay filling. No wonder this bun recipe is so popular. The bun is so soft &, more importantly, it is so fragrant & so delicious! Big thumbs up for this recipe! And the satay filling just makes these buns so irresistible!!


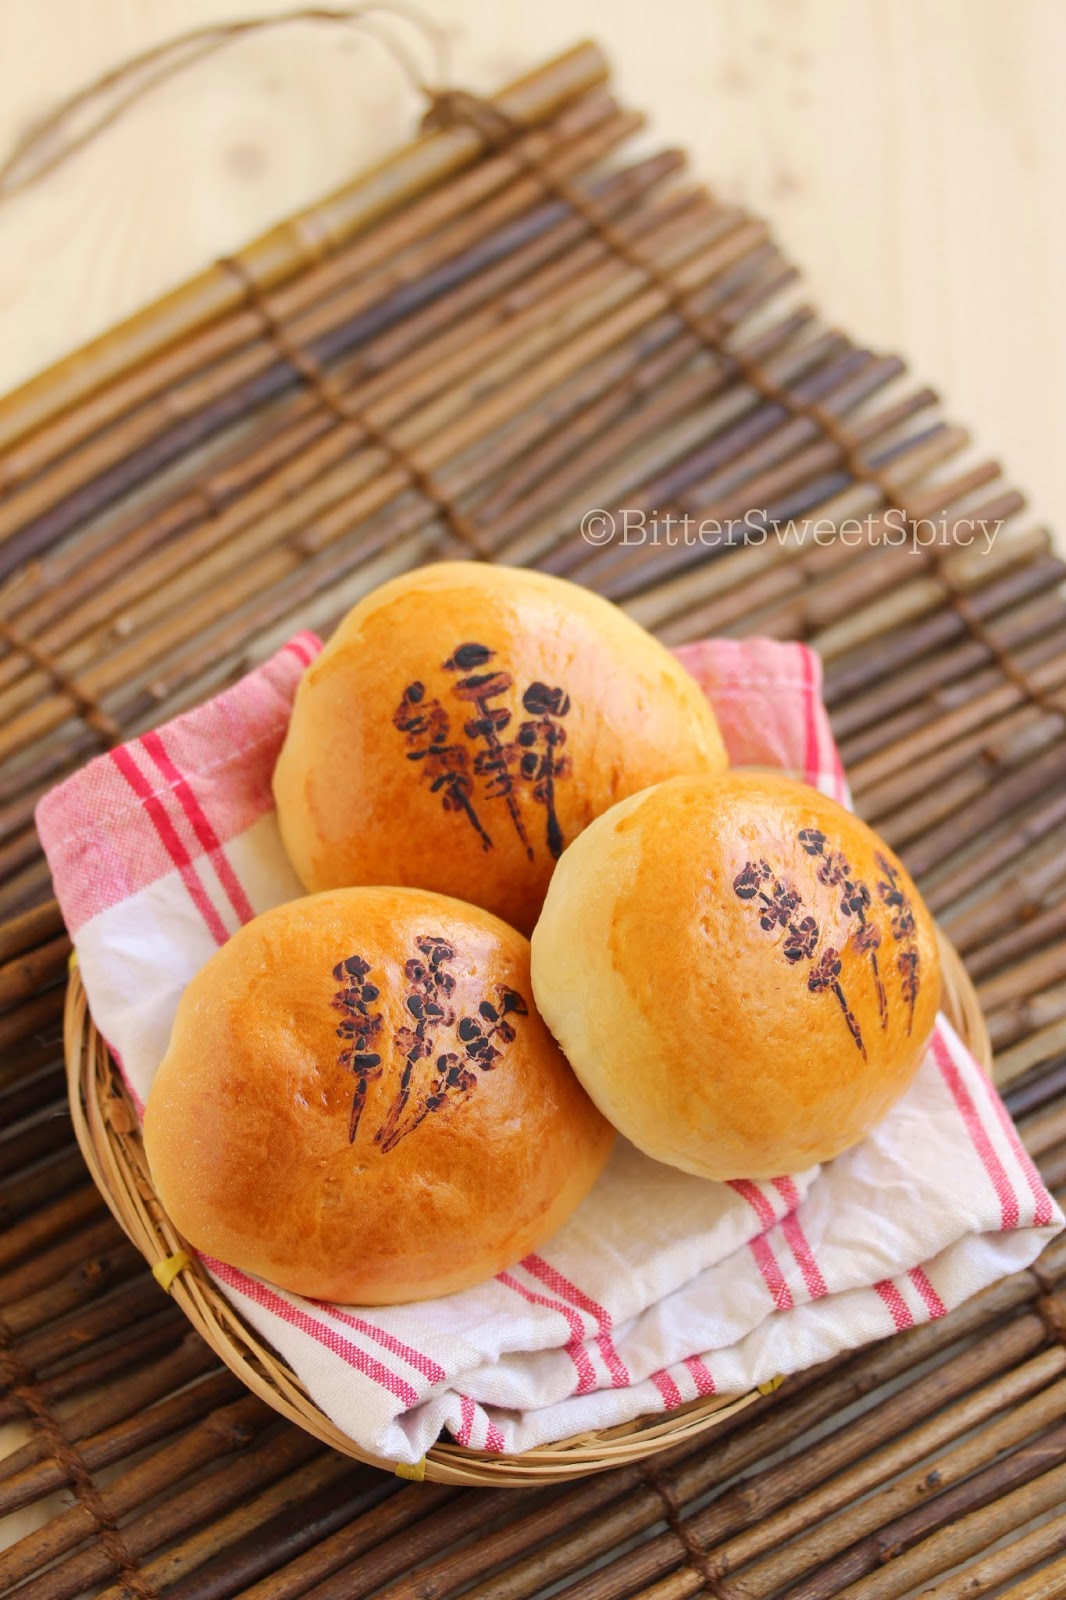
I was also inspired to decorate my buns by one & only Victoria. If you had been following her, you would have seen how she has been showcasing her creativity in her baking products. I can't draw well, so  nobody could figure out that I had drawn some sticks of satay on my buns. They all thought that they were some flowers or wheat! ^_^ 


DOUGH
Overnight sponge dough:
215g high protein flour
125g full cream milk (cold) - I used 135g.
2g instant yeast (1/2 tsp)
Mix all ingredients in a bowl till a rough dough is formed. Cover the bowl with cling wrap and store in the fridge overnight.

Basic dough:
1 quantity of above overnight sponge dough
90g high protein flour
12g milk powder (Sonia didn't use.)
30g egg (1/2 large egg)
4g instant yeast (1tsp)
3g fine salt (1/2 tsp)
60g sugar
45g butter (room temperature) - I used only 30g.
1tbsp milk (cold)
for egg wash, combine 1/2 egg & 1/2 tsp of milk

Method:
  1. Tear the overnight sponge dough into pieces into a mixing bowl. Add in the rest of ingredients, except butter, & knead till a smooth dough is formed. 
  2. Add in butter and knead until dough is smooth, shiny and elastic. (I mixed mine using the electric mixer [dough hook] for about 10 minutes in all.)
  3. Cover the bowl with cling film and set aside to proof till double in size for 45-60 minutes. (I poured the dough onto a floured working surface & mould it into a smooth round. Then I covered it with the unwashed bowl that I used for mixing.)
Source: Sonia @ Nasi Lemak Lover.

BEEF SATAY FILLING
Ingredients:
200g ground beef
1 1/2 tbsp ground coriander seeds
1 1/2 tsp ground cumin
1/4 tsp tumeric powder
1/2 tsp salt (adjust to taste)
3 tbsp very dark brown sugar  - adjust based on your preference
1/8 cup ground toasted peanuts
1 tbsp tamarind juice 
1 tbsp cooking oil
1tbsp cornflour + 3 tbsp water (I didn't use this. Refer to note no. 1. )

ground into paste
4 small red onions
1 clove garlic
2 cm galangal (lengkuas)
1 stalk lemongrass (white part only)

Method: 
  1. Combine all the ingredients above, except the oil & cornflour mixture, & mix thoroughly. Leave to marinate in the fridge for 1 hour. 
  2. After 1 hour, heat up the oil in a frying pan. Add in the meat mixture & stir frequently. If the mixture is too dry, add some water. Once it's cooked, pour in the cornflour mixture & stir well. Transfer the cooked filling into a colander to drain any excess liquid. Leave to cool before wrapping in the dough.
ASSEMBLY
  1. After the first proofing, divide the dough into small pieces & form into small balls. I divided mine into 19 pieces of 30g each. 
  2. Roll out each ball into a dics & spoon filling. Wrap & seal the dough. Place onto a baking pan lined with baking paper. Do the same with the rest. Leave to proof for about 30 minutes.
  3. Once proofed, apply egg wash on the buns & bake for about 15 minutes, in a preheated oven at 190 deg C, or until they turn golden brown.
Notes & modifications:
  1. I find the filling quite dry. Some of it though was so watery that I had difficulty sealing the dough. So I suggest you add the cornflour & water mixture to produce moist filling.
  2. For the drawing on top of bun, I used a mixture of cocoa powder & water to form a paste. Then I used chocolate dipping tool to draw. You can use anything in the kitchen that's suitable for drawing. Apply the egg wash & let it dry a little before drawing. Go to Victoria Bakes to get more amazing ideas to decorate your buns. 

Thursday, 6 November 2014

Kuih Peria

I bet some of you really thought that the picture that I shared on Instagram & FB page two days ago was really that of real bitter gourds. Since I labelled the picture as 'sweet bitter gourd',  two of my friends thought that there was really a sweet bitter gourd variety... hehe. 


They are actually Kuih Peria or what the Indonesians call Kuih Perape.  Sweet & rich, they are quite similar to Kuih Angku, except they're shaped to look like bitter gourd & the filling is sweet grated coconut instead of mung bean paste. They really taste like Kuih Koci. I find them quite cute & if you were to serve them for a gathering, I'm sure it'll be an interesting topic of discussion!


Kuih Peria a.k.a. Kuih Perape
Ingredients:
250g glutinous rice flour
1 tbsp limewater (air kapur)
1/4 tsp salt
175 ml thick coconut milk from 1/2 coconut (I used 240ml.)
50 ml pandan juice
4 drops green colour
filling (recipe below)
coconut milk wash (see below)
banana leaves (cut into rectangles of about 5x2.5 cm)

Method:
  1. Combine limewater, salt, pandan juice & colouring & mix well. Pour into the flour. Add in coconut milk & mix thoroughly to form a smooth & soft dough.
  2. Take some dough (I weighed 25g.) Spoon a teaspoon of filling onto the dough & seal. Roll the dough gently between palms till round. Then roll it to form an oval. Using the thumb & forefinger, gently pinch the two ends of the oval dough. Then, use  the  blunt edge of a knife & press some lines to create the 'bitter gourd'. Place the kuih on a piece of  banana leaf which has been lightly greased with oil. Brush the top of kuih with some coconut milk wash. 
  3. Do the same with the rest of the dough. Steam for about 15 minutes. Then brush the cooked kuih with the coconut milk wash again before serving.

FILLING
50 ml water
75g gula Melaka (chopped)
15g granulated sugar
100g freshly grated coconut
1 pandan leaf
1/8 tsp salt
     Combine water, gula Melaka, granulated sugar into a saucepan & boil the mixture. Strain & pour back into the saucepan. Add in coconut, pandan leaf & salt. Stir until cooked & almost dry. Set aside to cool.

COCONUT MILK WASH
50 ml coconut milk
1/8 tsp salt
     Combine both ingredients in a saucepan & cook over low fire, stirring frequently, until it starts to boil. Set aside to cool.

Makes 20 pieces.
Recipe from Sedap Magazine (October 2014).

Notes & modifications:
  1. Since I used freshly-squeezed coconut milk, I cooked it over medium low fire, stirring frequently, until it starts to boil. I used 125ml thick coconut milk (squeezed without water) & added some water & boiled it to get 240ml. If you are using coconut milk from the box, I don't think you need to cook it. Just mix some with water.
  2. I had to add more liquid (65 ml more) to the dough because my dough was quite dry. Please adjust the liquid accordingly. The dough should be smooth & moderately soft.
  3. To prepare pandan juice, take a big bunch of pandan leaves (10-20), blend with some water & strain, preferably with a cheese cloth.

Friday, 24 October 2014

Pumpkin Kuih Koci

I love Kuih Koci but rarely make it myself. Last Saturday, I made Pumpkin Kuih Koci, a version that's less commonly sold. Although I could not really taste the pumpkin, this Kuih Koci certainly tastes better than the regular ones. The coconut milk sauce added to the dough gives this delighful kuih its rich flavour. The dough needed no added water at all as the moisture from the cooked pumpkin was enough to bind the dough to a soft & addictive kuih. I love the colour too!


Pumpkin Kuih Koci
(Kuih Koci Labu)

DOUGH
150g (1&1/4 cup) glutinous rice flour
280g (1 cup + 2 tbsp) cooked pumpkin – mashed (Original recipe uses only 1 cup.)
salt to taste
banana leaves for wrapping - soften & cut into about 4x4 - inch squares (see note no. 1)
     Combine the flour, pumpkin & salt & mix thoroughly. The dough  is quite sticky. You may add more flour, but don't add too much or the kuih will be hard.

COCONUT MILK SAUCE (DADIH)
1 cup thick coconut milk
1 tsp rice flour
a pinch of salt
Combine & cook on low fire, stirring continuously,  until it starts to boil.

FILLING (my own measurement)
75g (1small piece) gula Melaka
1/2 tbsp granulated sugar
50ml (about 2 tbsp) water
125g (1 cup) freshly-grated coconut
1/2 tbsp rice flour (Chah uses plain flour.)
a pinch of salt
2 pandan leaves (torn)
     Combine gula Melaka, granulated sugar & water in a saucepan & cook until it boils. Remove from fire & strain the syrup. Rinse the saucepan & pour back the gula Melaka syrup. Add in the coconut, rice flour, salt & pandan leaves. Cook over medium fire until mixture is almost dry. Set aside.

ASSEMBLY
  1. To prepare the banana leaves, wash & dry the leaves. Then run one leave at a time on hot electric or gas stove. This will soften the leaves & prevent tearing when wrapping the kuih koci. Then cut the leaves into 4-inch squares.
  2. Take a piece of leave & place some dough onto it. Place some filling & top it with some more dough. Wrap & place it on a steamer. Continue with the rest of dough & filling.
  3. Steam over medium fire for about 20 minutes.
Recipe adapted from Bila Chah Ke Dapur.

Notes:
  1. I steamed 480g raw pumpkin. After removing the seeds & peeling the skin, I was left with 280g of cooked pumpkin.
  2. The dough was quite sticky but I didn't want to add too much flour as I wanted my kuih koci to be soft. Instead of forming the kuih into a ball shape, I found it easier to just spoon the dough onto the leave. You may also oil you palm a little when shaping the dough.
I'm linking this post to the event Little Thumbs Up (Oct 2014 Event: PUMPKIN), organised by Zoe (Bake for Happy Kids) and Mui Mui (My Little Favourite DIY) and hosted by Eileen (Eileen's Diary).

Thursday, 25 September 2014

Talam Seri Medan

When I went to the  Geylang Serai market last week, besides the cempedak, I also bought a big bunch of pisang raja. It's rare to find pisang raja in my neighbourhood market, so I couldn't resist buying a bunch after seeing a few beautiful bunches hanging from a fruit stall....


I used up most of it fry banana fritters, using the batter recipe I used for my fried cempedak. Since it's been a long time since I last made a steam kuih, I decided to make one so that I could use up all the bananas. I looked through my file & saw a couple of recipes which I'd not tried before & finally decided to try making Talam Seri Medan. The recipe is by my favourite weekend-baking instructor, Wannah Alshatrie, but this time the recipe was passed down to me by my baking kaki then. 


I'm happy with how it turns out. The banana, coconut & sugar give out a combination of wonderful flavours... The texture was good & easy to handle... but when I make this again, I would reduce the rice flour or increase the liquid for the bottom layer as I like my kuih to be a little bit soft. I'm glad I added the diced banana & green sago pearls for added texture.... the kuih looks beautiful & very appetising, don't you think..?


Talam Seri Medan

BOTTOM LAYER

Ingredients:
50g palm sugar (gula Melaka) + 25ml plain water
60g rice flour
25g tapioca or sago flour
70g granulated sugar
200ml diluted coconut milk (I used 50ml coconut milk from the box & added 150ml water.)
125g (2 medium) bananas (pisang raja or berangan) - mashed
1/2 to 1 medium banana, diced - I added.
brown colouring
1/2 tsp salt

Method:
  1. Combine palm sugar  & water  in a saucepan & cook until the sugar melts. Strain & set aside.
  2. Combine palm sugar syrup, rice flour, tapioca flour, sugar, coconut milk & salt in a bowl & mix thoroughly. Strain & add in mashed & diced bananas & colouring. Mix until well-blended.
  3. Pour mixture into a saucepan & cook on low fire (on the stove), stirring continuously until the mixture thickens slightly & steam starts to appear.
  4. Pour mixture into a pan lined with silicone baking paper. (Read notes below.)
  5. Steam for 15 minutes over medium fire. 
  6. Once cook, scratch the top of kuih gently with a folk before pouring the mixture for the top layer.
TOP LAYER

Ingredients:
20g sago pearls - I added.
200ml thick coconut milk (I used 150ml coconut milk in the box & mix with 50ml water.)
35g rice flour
15g tapioca or sago flour
1/2 tsp salt

Method:
  1. Cook the sago pearls in boiling water until they become transparent. Strain & rinse under running water until they cool down. Set aside.
  2. Combine coconut milk, rice & tapioca or sago flour & salt in a bowl. Mix throughly. Then strain & add in cooked sago pearls. Mix until well blended.
  3. Pour mixture onto the cooked bottom layer & steam for 20 minutes.
  4. Remove pan from the steamer & allow to cool completely. Cut the kuih using a plastic knife.
Notes & modifications:
  1. The above recipe is only 1/4 of the original recipe.
  2. I used a mess tin measuring 7 x 5 1/4 inch (18 x 13 1/2 cm ) for my kuih. You may also use  6 x 6 inch (15 x 15 cm) pan. The kuih is 3cm tall, 2cm for bottom & 1cm for the top layer. If you want to make it in a 8 x 8 inch pan, I suggest you double up the above recipe.
  3. In all, I used a box (200ml) of coconut milk. 
  4. The pan must be greased or lined so that it's easy to release the kuih from it. Traditionally, the pan is greased with oil & heated up before the kuih mixture is poured into it. Now, it's a common practice to line it with a plastic, so one only needs to lift up the plastic to release the kuih from the pan. I think that's a great idea except, I'm not comfortable with cooking with the plastic. So I would usually line my pan with silicone paper (siliconised baking paper) for my steam kuih.
  5. When removing the steamer cover, lift it carefully so that water from the cover does not drip onto the cooked kuih. If there's any water dripping on the kuih, dab it gently with a kitchen paper towel or damp kitchen towel.
Recipe by Wannah Alshatrie.
Related Posts Plugin for WordPress, Blogger...