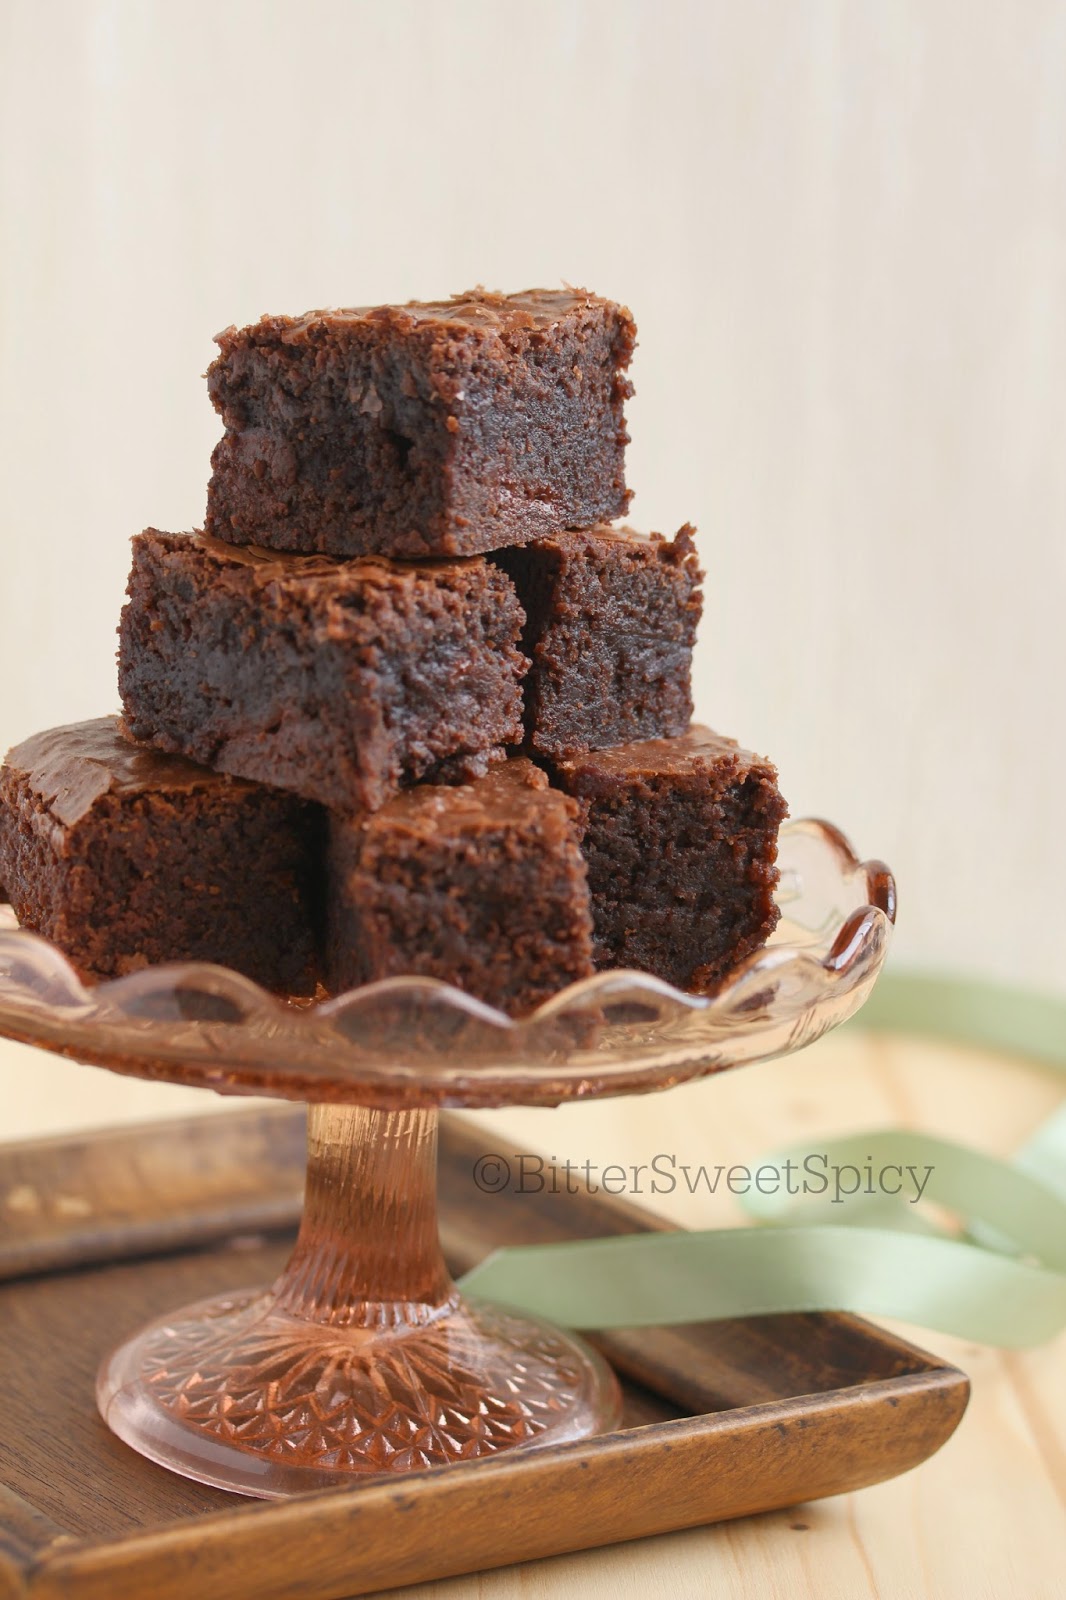
Showing posts with label Chocolate. Show all posts

Friday, 8 September 2017

Chocolate Cupcakes with Nutella Filling and Salted Caramel Swiss Meringue Buttercream

If you have been following this space, you would be aware that blogging here has slackened a lot.... that's ever since I agreed to take up more responsibilities at work. As a result, I've also seldom taken out my dslr for my photo shoots. But two weeks ago, I just had the urge to use the camera to capture some shots of my Gula Melaka Chiffon Cake which I shared on FB and IG. I just love the pictures.... No way would I be able to capture those beautiful shots with my iphone....


I realise that using the big equipment is not the difficult part. For me, it's styling the set-up for the shots that often takes up a big part of the whole process. Without fail, I would be perspiring at the end of the photo shoot. Come to think of it, if I just shoot close-up pictures, very minimal set-up is really needed for some nice shots. So, I should pick up my mojo and the  dslr camera and start taking nice food pictures, especially when taken at home...


The final week of term 3 was a short one because of Teacher's Day and Hari Raya holidays. Things in school were also slowing down after the term tests.. So I had the urge to bake something... and what better excuse to bake than to celebrate Teacher's Day!


I've been yearning to try some recipes by Lindsay of Life, Love and Sugar for some time..... Her cakes always look so moist and mouth watering. I decided to bake her very moist-looking chocolate cupcakes, fill them up with Nutella and frost them with Swiss Meringue Buttercream, my favourite kind of frosting. I totally love the cupcakes.... they are so moist, so chocolatey and so good!! If you are a fan of chocolate cakes, you must try baking these... they are totally worth the calories!


Chocolate Cupcakes with Nutella Filling and Salted Caramel Swiss Meringue Buttercream

CHOCOLATE CUPCAKES
Makes 24 cupcakes

Ingredients:
2 cups cake flour
2 cups sugar
3/4 cup Hershey’s Special Dark Cocoa powder (I used Valrhona.)
2 tsp baking soda
1 tsp salt
2 large eggs
1 cup buttermilk
1 cup vegetable oil
1 1/2 tsp vanilla
4 tbsp espresso powder (I used 3 tbsp Nescafe instant coffee.)
1 cup boiling water

FILLING
Nutella spread

Method:
1. Put all dry ingredients in a large bowl and whisk together.
2. Add eggs, buttermilk and vegetable oil to the dry ingredients and mix well.
3. Add vanilla and espresso to boiling water and add to mixture. Mix well.
4. Pour into cupcakes pans lined and bake at 300°F (150°C) for about 20-25 minutes.
5. When done, remove cupcakes from oven and cupcake tin and allow to cool.

Recipe by Life, Love and Sugar.


SALTED CARAMEL SWISS MERINGUE BUTTERCREAM

Ingredients:
5 large (150 grams) egg whites
1 1/4 cups (250 grams) granulated sugar (I reduced this by 2 tbsp.)
3 sticks (340 grams) unsalted butter, at room temperature
2 teaspoons pure vanilla extract
1/4 teaspoon fine salt
3 tbsp salted caramel sauce
more salted caramel sauce for the drizzle

Method:
1. Add egg whites and sugar to a clean and dry mixing bowl. Make a double boiler by placing the bowl over a saucepan of simmering water, making sure the bowl doesn’t touch the water. Whisk the egg white mixture constantly but gently until temperature reaches about 140°F (60°C) or until the sugar has completely dissolved and the egg whites are hot.
2. Remove the mixing bowl from the saucepan and attach it to the mixer fitted with the whisk attachment and begin to whip until the meringue is thick, glossy, and the bottom of the bowl no longer feels warm, about 7 to 10 minutes.
3. Switch over to paddle attachment and, with mixer on low speed, add the butter cubes, one at a time, until incorporated. Continue beating until it has reached a silky smooth texture. If the buttercream curdles, just keep mixing and it will come back to smooth. If the buttercream is too thin and runny, refrigerate for about 15 minutes before continuing mixing with paddle attachment until it comes together. Add the vanilla, salt and salted caramel sauce and continue beating on low speed until well combined.
Recipe adapted from Handle the Heat.

Assembly:
1. Core the center of the cupcake.
2. Spoon a teaspoon or 2 of Nutella into the cavity.
3. Pipe the Swiss Meringue Buttercream onto the cake.
4. Drizzle salted caramel sauce.
     

Monday, 21 December 2015

Pastry Pockets with Nutella Filling

It feels like a long time since I last posted here.... Been pretty busy this past month... spent the first part of the holidays decluttering the house, which has not been an easy task especially since we have lived in this house for 20 years now.... We also spent a week in UAE for a family getaway.... that, was truly awesome since we had not gone for a holiday outside SE Asia for the longest time! It was also an eye-opening experience for the family as this is our first (except for my husband) visit to the Middle East. Now we are back to continue with the decluttering  before the school term starts in two week's time. Oh no!!


So today's recipe is inspired after I tasted some addictive pastry pockets from Tim Hortons when we were in Dubai. They are basically doughnuts, cut in rectangles & filled with Nutella... but they taste so good, especially when I had them with the hot cardamon chai. Just talking about it makes me want to have it right now! Haha.. 


If you had made doughnuts before, this would not be too difficult... the only messy part was when I tried to pipe the filling..... but believe me, the mess is all worth it! For the dough, I used the potato doughnut recipe which I shared before as I just love its soft & fluffy texture. Do try making these gems.... I know it's not something out of the ordinary but anybody who tries them would definitely have only good things to say.... just don't let them talk about the calories. :D


I went overboard with the filling for this piece... hehe..

Pastry Pockets with Nutella Filling
Ingredients:
250g high protein flour (bread flour)
25g milk powder
5g instant yeast (1 tsp)
50g sugar
100g potato
50 ml cold water (I added 3 tsp more water. See note no. 1)
2 egg yolk
40g butter
1/4 tsp salt
vegetable oil for deep frying
Nutella spread (for filling)
icing sugar for coating the pockets

Method:
  1. Steam, microwave or roast the potato. Leave to cool slightly. Remove the skin and blend with the cold water until it becomes a smooth puree. Leave to cool. (I peeled & cut the potato into big pieces & roasted them until cooked & soft. I roasted them because I was also roasting some potatoes for my roasted-potato bread.)
  2. Combine flour, milk powder, yeast and sugar in a mixing bowl. Add the blended potato and egg yolk and mix using the dough hook for about 2 minutes. 
  3. Add in butter and continue mixing for about 2 minutes. Finally, add in salt and mix for another 3 minutes until the dough is smooth & elastic.
  4. Remove the dough from the bowl and shape it into a ball and place it in a clean & greased bowl. Cover the dough with a cloth & leave it to prove for about 45 minutes.
  5. Turn the dough out onto a lightly floured board and knead for 4 minutes or until the bubbles are out of the bread. Leave to rest for 10 minutes.
  6. Roll out the dough evenly into about 1 cm thickness. Using a knife or pizza cutter, cut the dough into rectangle or diamond-shaped pieces. Place the cut pieces onto a floured tray. Cover with tea towel & leave to proof for about 35 minutes.
  7. Deep fry in medium hot oil till golden brown.
  8. Fill up a piping bag with Nutella spread. Using a small plain nozzle, make a hole on one side of the fried pastry & pipe the filling. Finally coat  with fine sugar.
Notes & modifications:
  1. The mixture will look very dry at first, just carry on mixing until a soft dough is formed. If the mixture is still dry, add some more water, one teaspoon at a time until it forms a smooth & soft dough. I think the amount of water needed will depend on the type of potato used. Previously when using this recipe, I did not have to add more water but this time, I added 3 teaspoons.
  2. I started mixing the dough late at night. So after step 3, I placed the dough in an air-tight bowl & left it in the fridge. The next morning, I took the bowl out of the fridge & left it in room temperature for about 30 minutes. Then I continued with step 5.
  3. The above recipe is half the original recipe & it yields quite a lot of pastry pockets. So for small serving, you may want to start with half the above recipe. But I must warn you, these pockets are quite addictive! 

Wednesday, 11 November 2015

Moist & Tender Marble Cake... again

I made the moist & tender marble cake again... this time it's for lunch at the in-law's on Sunday. Had decided to bake it only in the morning after making some karipap bai. Made 3 changes for this cake.. made it with less chocolate batter, replaced the sour cream with greek yogurt & baked it in a square pan. It was a hit with the family... I promise you I'll be baking this again & again...


Moist & Tender Marble Cake

Ingredients:
2½ cups (8.7oz/ 250g) cake flour
2½ teaspoons baking powder - I used double-acting baking powder.
½ teaspoon baking soda
½ teaspoon salt
¾ cup (6.4oz, 181g) greek yogurt, at room temperature
¼ cup whole milk, at room temperature
1 cup (8oz, 227g) unsalted butter, softened to room temperature
1½ cups (10½oz, 300g) granulated sugar
2 large eggs, at room temperature
1 large egg yolk, at room temperature
1 tablespoon pure vanilla extract (1½ tablespoons if using imitation vanilla extract)

Method:
  1. Adjust the oven rack to middle position and preheat the oven to 350F/180C.
  2. Butter and line a square baking pan. (I used a 9x9-inch pan.)
  3. In a medium bowl, whisk together the flour, baking powder, baking soda and salt. Set aside. In a liquid measuring cup (or a small bowl), whisk together the yogurt and milk. Set aside.
  4. In the bowl of a electric mixer fitted with a paddle attachment (or in a large bowl and an electric hand mixer), beat the butter on medium speed until creamy, ribbon-like and slightly lightened up; 2 to 3 minutes.
  5. With the mixer running on medium-low speed, gradually add in the sugar. Raise the speed to medium-high and continue beating together until lightened up in both colour and texture; 4 to 5 minutes. The colour should turn very pale (almost white) and texture should look fluffy.
  6. Add the eggs and egg yolk, one at a time, beating well after each addition. Add in the vanilla and beat together for one minute.
  7. On lowest speed, add in one-third of the flour mixture and mix until mostly combined. Add in half of the sour cream/milk mixture and lightly stir until almost mixed in. Continue with adding another one-third of the flour mixture, followed by the remaining sour cream and ending with the last third of flour mixture. Mix until just combined and a smooth batter forms. Do not overmix. With a rubber spatula, give the batter one good, final stir to make sure that everything is well incorporated.
  8. Remove 1½ cups of the batter from the bowl & mix with the chocolate paste (recipe below).
  9. To create the marble effect, start by filling the bottom of the pan with vanilla cake batter, followed by the chocolate batter. Continue pouring in alternate pattern. Finally, you may use a butter knife and swirl the batter in an 'S' shaped motion, but don't over do it. (I did not swirl the batter.)
  10. Bake in the oven for 40 to 50 minutes, or until the center springs back to the touch and a skewer inserted down the center of the cake comes out clean or with a few moist but cooked crumbs attached.
  11. Allow to cool in the pan for 20 minutes then invert onto a wire rack to cool completely. Serve plain or dust with powdered sugar or drizzle with chocolate ganache glaze if you prefer.
CHOCOLATE PASTE FOR THE CHOCOLATE BATTER
Ingredients:
¼ cup plus 2 tablespoons (30g/ 1⅛oz) unsweetened cocoa powder
2 tablespoons milk
1 tablespoon (1/2 oz, 15g) unsalted butter
1 tablespoon sugar
⅛ teaspoon baking soda

Method:

  1. In a medium bowl, combine the milk, butter and sugar and heat in the microwave until the butter has melted. Whisk to dissolve the sugar. 
  2. Add in the cocoa powder and stir really well until there are no lumps and a very thick chocolate paste forms. Add in the baking soda and stir again.
  3. Take a few tablespoons from the reserved vanilla cake batter and stir really well into the chocolate paste to lighten it up. Add the remaining reserved cake batter into the chocolate mixture and fold until evenly incorporated and no light streaks remain.
Recipe by Tasbih of Cleobuttera.

The karipap bai....


Monday, 12 October 2015

Moist & Tender Marble Cake

I made this super moist & delicious marble cake more than a week ago... had wanted to complete & publish this post much earlier but it had taken me a few logins before I could complete this. Anyway, I stumbled upon an awesome instagram by a blogger, Tasbih of Cleobuttera (I love the name too!) & couldn't wait to bake the marble cake that she had baked. Definitely one of the best marble cakes I've ever eaten before! Just look at the pictures below or just hop over to her blog post for more beautiful pictures of the cake. Don't you want to bake it too?


Moist & Tender Marble Cake

Ingredients:
2½ cups (8.7oz/ 250g) cake flour  (* see note below for the substitute)
2½ teaspoons baking powder - I used double-acting baking powder.
½ teaspoon baking soda
½ teaspoon salt
¾ cup (6.4oz, 181g) sour cream, at room temperature
¼ cup whole milk, at room temperature
1 cup (8oz, 227g) unsalted butter, softened to room temperature
1½ cups (10½oz, 300g) granulated sugar
2 large eggs, at room temperature
1 large egg yolk, at room temperature
1 tablespoon pure vanilla extract (1½ tablespoons if using imitation vanilla extract)

Method:
  1. Adjust the oven rack to middle position and preheat the oven to 350F/180C.
  2. Butter and flour (or generously spray with a non-stick cooking spray) a 10-cup bundt pan (*see note no. 2).
  3. In a medium bowl, whisk together the flour, cornstarch, baking powder, baking soda and salt. Set aside. In a liquid measuring cup (or a small bowl), whisk together the sour cream and milk. Set aside.
  4. In the bowl of a electric mixer fitted with a paddle attachment (or in a large bowl and an electric hand mixer), beat the butter on medium speed until creamy, ribbon-like and slightly lightened up; 2 to 3 minutes.
  5. With the mixer running on medium-low speed, gradually add in the sugar. Raise the speed to medium-high and continue beating together until lightened up in both colour and texture; 4 to 5 minutes. The colour should turn very pale (almost white) and texture should look fluffy.
  6. Add the eggs and egg yolk, one at a time, beating well after each addition. Add in the vanilla and beat together for one minute.
  7. On lowest speed, add in one-third of the flour mixture and mix until mostly combined. Add in half of the sour cream/milk mixture and lightly stir until almost mixed in. Continue with adding another one-third of the flour mixture, followed by the remaining sour cream and ending with the last third of flour mixture. Mix until just combined and a smooth batter forms. Do not overmix. With a rubber spatula, give the batter one good, final stir to make sure that everything is well incorporated.
  8. Remove 2 cups of the batter from the bowl & mix with the chocolate paste (recipe below).
  9. Transfer the vanilla cake batter into the prepared pan, then using the back of a spoon, make a tunnel in the middle, around the pan. Spoon the chocolate batter into the tunnel, avoiding the sides. Using a butter knife, swirl the 2 batters together in an 'S' shape motion. 
  10. Bake in the oven for 40 to 50 minutes, or until the center springs back to the touch and a skewer inserted down the center of the cake comes out clean or with a few moist but cooked crumbs attached.
  11. Allow to cool in the pan for 20 minutes then invert on to a wire rack to cool completely. Serve plain or dust with powdered sugar or drizzle with chocolate ganache glaze if you prefer. The cake will keep for 3 days stored in air-tight container, at room temperature.
CHOCOLATE PASTE FOR THE CHOCOLATE BATTER  

Ingredients:
1/2 cup (40g) unsweetened cocoa powder - I used Valrhona.
3 tablespoons milk
1½ tablespoons butter
1½ tablespoons sugar
3/8 teaspoon baking soda

Method:
  1. In a medium bowl, combine the milk, butter and sugar and heat in the microwave until the butter has melted. Whisk to dissolve the sugar. Add in the cocoa powder and stir really well until there are no lumps and a very thick chocolate paste forms. Add in the baking soda and stir again.
  2. Take a few tablespoons from the reserved vanilla cake batter and stir really well into the chocolate paste to lighten it up. Add the remaining reserved cake batter into the chocolate mixture and fold until evenly incorporated and no light streaks remain.
  3. For less chocolate batter (as used by Tasbih), mix 1½ cups of the vanilla batter in the following amount of chocolate paste:
    ¼ cup plus 2 tablespoons (30g/ 1⅛oz) unsweetened cocoa powder
    2 tablespoons milk
    1 tablespoon (1/2 oz, 15g) unsalted butter
    1 tablespoon sugar
    ⅛ teaspoon baking soda
Recipe by Tasbih of Cleobuttera.

Notes:
  1. Using cake flour in cake baking produces a finer and more tender crumb. However, if you don't have cake flour on hand, Tasbih suggests that you replace it with a combination of 2 cups plus 3 tablespoon (7⅜ oz, 210g) of all-purpose flour & ¼ cup plus 1 tablespoon (1⅜ oz, 40g) cornstarch.
  2. Tasbih used 1½ cups of the vanilla batter for the chocolate marbling while I used 2 cups. Hence, the chocolate marbling for my cake is more pronounced than Tasbih's.
  3. The method of marbling used in this recipe creates a cake with subtle marbleness, meaning that the vanilla and chocolate portions are more distinct in 2 different ends, instead of them being thoroughly mixed in a zebra-like pattern. To create a more layered marbling effect, you may alternate between batter layers. Start by filling the bottom of the pan with ⅓ of the vanilla cake batter, followed by ⅓ of the chocolate batter, then cover with another third of the vanilla batter, then another third chocolate, the remaining vanilla then finishing off with the chocolate. Using a butter knife, swirl together in an 'S' shaped motion, but don't over do it.
  4. Based on the volume of the batter, I suggest that you bake in a 10x10 8x8 or 9x9-inch baking pan if you are not using a bundt pan.

Sunday, 6 September 2015

Banana Nutella Pound Cake

This is the pound cake that I baked on Thursday evening... was inspired to bake it after seeing the moist cake on Cheryl's blog. Another great marble cake recipe... the cake is moist & has moderately dense texture with fine crumbs. It also has just the right level of sweetness & the banana flavour is just nice. What's lacking is the Nutella flavour... Nobody could actually tell that there was Nutella in the cake... Perhaps adding hazelnuts & more Nutella would enhance the overall Nutella flavour. 


Banana Nutella Pound Cake
Ingredients:
225g premium unsalted butter, at room temperature (must not be too soft, just until you are able to make a slight impression with your finger)
140g caster sugar
1/4 tsp salt
1 tsp pure vanilla extract
3 eggs, room temperature
200g all-purpose / plain flour (I used cake flour.)
1/4 tsp baking powder (I used double acting.)
1/4 tsp baking soda
35g fresh whole milk (I used UHT.)
100g mashed banana (from 3 small bananas)
1 tsp fresh lemon juice (combined with the mashed banana)
50g nutella

Method:
  1. Preheat oven at 160 deg C. Line & grease a 9x5-inch loaf pan.
  2. Combine flour, baking powder & baking soda. Sift & set aside.
  3. In another bowl, combine butter, sugar, salt & vanilla extract. Beat until pale & creamy.
  4. Add eggs, one at a time, & beat until just combined.
  5. Fold in flour in 3 parts, alternating each part with milk.
  6. Scoop out about 1/3 of batter into another bowl & add in nutella. Mix well. Add the mashed banana into the remaining batter. Mix well.
  7. Drop spoonfuls of banana batter into the pan. Then drop a spoonful of the Nutella batter on the banana batter. Continue doing this until finish. (I poured 2-3 parts banana & 1 part Nutella batter.) Using a skewer or knife, swirl the mixture a few times to create a marbled effect. 
  8. Bake at 160 deg C for about 50 to 60 minutes or until skewer inserted in the center of cake comes out clean. Remove from pan & leave to cool.
(The above recipe is half the original recipe posted by Cheryl.)
Recipe by Baking Taitai, with slight modifications to the method.

Saturday, 2 May 2015

Marble Cake

I've been craving for marble cake these past weeks.... Since I had not tried any new marble cake recipe for some time, this would be a good time to try one. So on Thursday night, I quickly whipped up the mixture & managed to finish baking this classic cake before midnight.


I'm really happy how the cake turned out. My experience with baking marble cakes has not always had a happy ending, especially when it comes to the marble effect. I actually cut this cake just 10 minutes after it was out of the oven as I couldn't wait to see if I had succeeded this time. 


Besides the marble effect, I also like the texture and the flavour of this cake. It is moist, moderately dense with fine crumbs. It is not too sweet, so there's no need to reduce the sugar. The chocolate flavour is also quite intense even though it only makes up one third of the cake....it must be the Valrhona cocoa. So overall, this is a great recipe. You should try it and see if you like it.


Marble Cake

Ingredients:
250g butter or margerin or a combination of both, at room temperature (I used unsalted butter only.)
200g caster sugar
4 whole medium eggs
1 tsp vanilla extract
225g plain flour (I used cake flour.)
2 tsp baking powder
1/2 tsp salt (I used 3/4 tsp.)
50 ml fresh milk (room temperature)
2 tbsp cocoa powder (I used Valrhona.), mixed with about 2-3  tbsp boiling water to form a paste. Set aside to cool.
powder sugar for dusting on cake (optional)

Method:
  1. Preheat oven at 180 deg C. Line & grease a 22x10x10 cm loaf pan.
  2. Combine flour & baking powder, sift & set aside.
  3. Whip butter & sugar until pale & creamy.
  4. Add eggs, one at a time, & beat until just combined.
  5. Fold in flour in 3 parts, alternating each part with milk.
  6. Scoop out about 1/3 of batter into another bowl & add in cocoa paste. Mix well. Leave the remaining batter plain.
  7. Drop spoonfuls of plain batter into the pan. Then drop the chocolate batter on the plain batter. Continue doing this until finish. (I poured 2-3 parts plain & 1 part chocolate.) When all the mixture has been used up, tap the bottom on your work surface to ensure that there aren’t any air bubbles. Take a skewer or knife & swirl it around the mixture a few times to create a marbled effect. Bake at 180 deg C for the first 20 minutes, then reduce the temperature to 160 deg C and continue baking for about 25 to 40 minutes or until skewer inserted in the center of cake comes out clean. Remove from pan & leave to cool.
  8. Dust cake with powder sugar, if using, & slice to serve.
Source: rickeindriani_ordinarykitchen Instagram (with slight modifications to method)

Monday, 16 March 2015

Banana Scones

I made these light & tender banana scones this afternoon. The bits of chopped banana & chocolate chips are great additions to the lightly-sweetened scones. A great recipe if you are thinking of something simple yet delightful.


Banana Scones

Ingredients:
1 cup self-raising flour
1 1⁄2 tablespoons brown sugar
1⁄4 teaspoon salt
1⁄4 teaspoon cinnamon powder
3 tablespoons butter, cold (I used 45g.)
4 tablespoons low-fat milk (or light cream)
1⁄2 teaspoon vanilla extract
1⁄3 cup banana, diced (about half a medium banana)
1/4 cup semi-sweet mini chocolate chips

Method:
  1. Preheat oven to 200°C (400°F). Line a baking sheet with parchment paper.
  2. In a medium bowl, whisk together flour, sugar, salt and cinnamon powder. Cut butter into a few chunks and rub it into the flour mixture with your fingertips.
  3. Mix milk and vanilla in a small glass. Pour about 4 tablespoons into the flour mixture and stir until the mixture starts to come together. Add the banana chunks and chocolate chips. Continue to stir, adding more milk if necessary, just until dough comes together. Do not over mix.
  4. Pat dough into a disk about 1inch thick. Cut using a cookie cutter and place each piece on baking sheet. Brush the top with some milk (optional).
  5. Bake for 17-20 minutes, until light gold.
  6. Cool on wire rack or eat warm. These scones are best the day they are made.
Yields 8 pieces.
Adapted from swirlycinnacakes @ food.com.

Notes & modifications:
  1. The original recipe uses all-purpose flour plus 1 tsp baking powder.
  2. I used cinnamon powder instead of ginger powder as stated in the original recipe.
  3. I added the chocolate chips.
  4. You can also cut the patted dough into four sections with a knife instead of using a cookie cutter.


I'm linking this post to the Little Thumbs Up (March-2015 - BANANA) event organised by Zoe (Bake for Happy Kids) and Mui Mui (My Little Favourite DIY) and hosted by me, Faeez of BitterSweetSpicy.

Friday, 13 March 2015

Banana Chip Cookies

This is one of the many posts I still had in my folder. I thought now would be a good time to neaten it up & post it here since I'm co-hosting the LTU event this month. 


I don't remember why I wanted to bake these cookies.... I think it was because I wanted to use the whole wheat pastry flour which I bought from Mustaffa. That superstore! It always makes me buy things I don't plan to buy! Haha! No worries, you can just use plain flour instead.


Another great thing about this recipe is, it uses banana chips which happen to be my favourite snack. Just one suggestion, don't over bake the cookies as the soft ones are more flavourful than the crunchy ones.


Banana Chip Cookies

Ingredients:
1 & 3/4 cups whole wheat pastry flour
1/2 cup (toasted) wheat germ
1/2 teaspoon baking soda
1/2 teaspoon baking powder
scant 1/2 teaspoon fine grain sea salt
1/2 cup unsalted butter - I used 125g.
1 cup natural cane sugar (or brown sugar) - I used 3/4 cup
2 large egg
2 teaspoon vanilla extract (I used pure vanilla paste.)
2/3 cup banana chips, loosely chopped
1 cup chocolate chips
2/3 cup toasted walnuts, chopped

Note: If you can't find whole wheat pastry flour, regular all-purpose white flour will work. If you can't find wheat germ, substitute an equal amount of flour.

Method:
  1. Preheat oven to 375 deg F, racks in middle/upper middle. Line two baking sheets with parchment paper.
  2. Whisk together the flour, wheat germ, baking soda, baking powder, and salt. Set aside.
  3. In a large bowl, or stand mixer, beat the butter until lightly and fluffy, then beat in the sugar until it is the consistency of a thick frosting. Beat in the eggs one at a time, incorporating each fully before adding the next, and scraping down the sides of the bowl a few times along the way (important!). Stir in the vanilla. Add the reserved flour mix in two increments, stirring/mixing a bit between each addition (but not too much). By hand, stir in the banana chips, chocolate chips and walnuts - mix just until everything is evenly distributed.
  4. Drop 1 heaping tablespoon of dough for each cookie onto the prepared baking sheets 2 inches apart and bake for about 7 - 8 minutes, until barely golden on top and bottom, for soft cookies or about 15 minutes for crunchy cookies. Cool on racks.

Wednesday, 25 February 2015

Chewy Brownies

I've never baked brownies from the box mix. Apparently, these brownies which I bake from scratch are supposed to taste very close to the ones baked using the box mix. They are dark, dense, fudgy, chewy & have strong chocolate flavour, exactly how a fudge brownies should be. Love them! 


Chewy Brownies
(I copied & pasted the recipe from  Brown Eyed Baker & the changes that I made are in red.)

Ingredients:

1/3 cup Dutch-processed cocoa - I used Valrhona.
1½ teaspoons instant espresso (optional)- I added.
½ cup plus 2 Tablespoons boiling water
2 ounces unsweetened chocolate, finely chopped
4 tablespoons (½ stick) unsalted butter, melted - about 2 ounces or 60g
½ cup plus 2 Tablespoons vegetable oil
2 large eggs
2 large egg yolks
2 teaspoons vanilla extract
2½ cups (17½ ounces) sugar
1¾ cups (8¾ ounces) all-purpose flour
¾ teaspoon salt
6 ounces bittersweet chocolate, cut into ½-inch pieces- I used Valrhona 55% chocolate buttons.

Directions:
1. Adjust oven rack to lowest position and heat oven to 350 degrees F. Line a 9x13-inch baking pan with foil, leaving about a one-inch overhang on all sides (I used a 10x10-inch pan). Spray with non-stick cooking spray (I greased it with butter).

2. Whisk cocoa, espresso powder, and boiling water together in large bowl until smooth. Add unsweetened chocolate and whisk until chocolate is melted. Whisk in melted butter and oil. (Mixture may look curdled.) Add eggs, yolks, and vanilla and continue to whisk until smooth and homogeneous. Whisk in sugar until fully incorporated. Add flour and salt and mix with rubber spatula until combined. Fold in bittersweet chocolate pieces.

3. Scrape batter into prepared pan and bake until toothpick inserted halfway between edge and center comes out with just a few moist crumbs attached, 30 to 35 minutes (I baked mine for 50 minutes.). Transfer pan to wire rack and cool 1½ hours.

4. Using foil overhang, lift brownies from pan. Return brownies to wire rack and let cool completely, about 1 hour. Cut into 2-inch squares and serve. Brownies can be stored in an airtight container at room temperature for up to 4 days.

Recipe from Cook's Illustrated, March & April 2010.
Source: Brown Eyed Baker.

I'm linking this post to the Little Thumbs Up (February 2015) - Cocoa event organised by Zoe of Bake for Happy Kids & Doreen of my little favourite DIY & hosted by Grace of Life can be Simple.

Sunday, 22 February 2015

Moist Chocolate Cupcakes with Cream Cheese Chocolate Frosting

These cakes were baked many many weeks ago. I was looking for a chocolate cake recipe and this one caught my eyes. The method of mixing is rather unusual for a cake and the batter is also very watery. Surprisingly, the cakes turn out very moist and delicious. For the topping, I chose the rich and tangy cream cheese chocolate frosting. Perfect combination!


Moist Chocolate Cupcakes with Cream Cheese Chocolate Frosting

CUPCAKES
Ingredients:
60g plain flour
18g cocoa powder (I used Valrhona.)
1/2 tsp baking powder
1/2 tsp baking soda
1/4 tsp salt
40g brown sugar
40g caster sugar
1 tsp instant coffee granules (optional)
1 small egg
50ml  fresh milk (I used UHT.)
30ml canola oil (or any vegetable oil)
1 tsp vanilla extract
50 ml boiling water

Method:
  1. Preheat the oven to 180°C. Line a standard cupcake tray with 6 cupcake liners.
  2. Sift together the flour, cocoa powder, baking powder, baking soda & salt into a large bowl.
  3. Add the sugars, coffee, egg, milk, oil & vanilla. Beat using a mixer until combined. Scrape the sides of the bowl. 
  4. Then add the boiling water and mix until just combined. The batter will be very watery so don't be alarm. 
  5. Pour the batter into a measuring cup (it's so much easier and cleaner than using a spoon) & pour evenly into the liners. Place into the oven & bake for 20-22 minutes or until a tester inserted in the center comes out clean. 
  6. Remove from the oven & leave the cakes in the pan for about 10 minutes. Transfer the cupcakes from the pan  to a cooling rack & leave to cool completely before frosting. 
Makes about 6 standard size cupcakes.
Adapted from Chelsea.

CREAM CHEESE CHOCOLATE FROSTING
Ingredients:
125g cream cheese, softened
90g confectioners' sugar
30g unsalted butter, softened
1/4 tsp salt
1 tsp vanilla extract
16g unsweetened cocoa powder (I used Valrhona.)
2 tbsps milk (only if necessary)

Method:
        In a bowl, beat together the cream cheese, confectioner's sugar, butter, salt, vanilla & cocoa powder to a spreadable consistency. Beat in milk, if necessary, to adjust consistency of cream. Spread onto cooled cupcakes.

Adapted from Allrecipes.

I'm linking this post to the Little Thumbs Up (February 2015) - Cocoa event organised by Zoe of Bake for Happy Kids & Doreen of my little favourite DIY & hosted by Grace of Life can be Simple.

Thursday, 13 November 2014

Chocolate Chip Banana Buttermilk Pancakes

My daughter & I had our breakfast at KFC yesterday. I had my favourite porridge & the daughter ordered KFC's new addition, chocolate banana pancake meal. I took a bite of the pancake & was pleasantly surprised with the banana flavour. I'm not sure if real banana is added... if it's not, then the banana essence must be very good.


This morning, I was inspired to whip up some homemade chocolate banana pancakes. So I searched for a recipe & decided to use one from Food Network. Great recipe indeed... fluffy pancakes & the banana & chocolate combination was spot-on. They were so good, you could just have them on their own. My boy commented that eating them was  like eating pancakes with Nutella! Need I say more?


Chocolate Chip Banana Buttermilk Pancakes

Ingredients:
1 cup flour
1 1/4 teaspoons baking powder (I used double-acting baking powder.)
1/4 teaspoons baking soda
1 tablespoon sugar
1/4 teaspoon salt
3/4 cup buttermilk (I used 3/4 cup milk +1 tsp lemon juice. You may replace lemon juice with vinegar.)
1 large egg
3 tablespoons butter, melted
1/2 teaspoon vanilla essence or paste
1 very ripe medium banana (mashed)
1/4 cup chocolate chips
softened butter or vegetable oil, for cooking the pancakes

Method: 
  1. In a bowl whisk together the flour, baking powder & baking soda. 
  2. In another bowl, whisk together the buttermilk, egg, sugar, salt, melted butter & vanilla. Add in the mashed banana & blend well. Whisk the dry ingredients, including the chocolate chips, into the liquid until well combined. Don't over mix.
  3. Heat a griddle over moderate heat until hot enough to make a drop of water scatter over surface and brush with butter or oil. Working in batches, spoon batter onto griddle to form pancakes and cook until bubbles appear on surface and undersides are golden brown. Flip pancakes with a metal spatula and cook until undersides are golden brown and pancakes are cooked through. Serve warm.
Adapted recipe by Georgia Downard @ Food Network.

Wednesday, 10 September 2014

Salted Caramel & Nutella Chocolate Tarts

I finally assembled these chocolate tarts, after a few breaks in between preparing the different parts. It was quite a long process for me. It started with the salted caramel sauce which I made last Tuesday. Then on Friday, I made & baked the tart shells. The weekend was a busy one for me, so I kept the baked shells in the fridge & only managed to prepare the Nutella ganache & assemble the tarts on Monday morning.


The inspiration to bake these tarts came after I tasted the Nutella tart my daughter bought from a local cafe last week. I wanted to try a new recipe, so I flipped through Vincent Gadan's Homemade Pâtisserie, Pastry Made Easy & the chocolate & salted caramel tart caught my eye. 


Preparing the tart shells took longer than expected, thanks to the hot & humid weather here. My kitchen is not air-conditioned & I didn't want to do the rolling & cutting of the dough in my bedroom, so  the dough had to go into & out of the fridge a few times as it got soft & sticky rather fast. At the same time, I was also making another all-butter pastry, the one that required a lot of foldings, for another tart. And before starting with the chocolate dough, I also made a cheesecake for my son's birthday...  So, you can imagine how busy I was that day...


But all the effort & time spent making these delicious tarts really paid off! Salted caramel & chocolate make an amazing combination! The sweet caramel really balances off nicely with the rich bittersweet chocolate flavour from the ganache & melt-in-the-mouth sable. The hazelnut flavour from the Nutella & chopped nuts (which also gave great texture & crunch) seals off this must-try dessert. Just be sure to use good quality cocoa powder & chocolate for a truly luxurious French dessert.


Salted Caramel & Nutella Chocolate Tarts

Ingredients:

Chocolate Sable Dough

175g all-purpose/plain flour
5g almond meal
15g Dutch cocoa powder (I used Valrhona.)
110g unsalted butter, 1.5cm cubes, cold
2 pinches table salt
4g baking powder
75g pure confectioners' / icing sugar, sifted
1 egg (50-55g)
butter for greasing
flour for dusting

Salted Caramel Sauce
1/2 recipe (room temperature)

Nutella Ganache
100g dark chocolate pieces (I used Valrhona Equatoriale 55%.)
40g nutella (I'll add more the next time.)
125ml heavy cream (I used dairy whip cream.)
whole hazelnuts (toasted & chopped) - for topping

Method:

For the chocolate sable dough:

  1. Place the flour, almond meal and cold butter into a mixing bowl and rub the ingredients between your hands until it forms a sandy texture. This should take a few minutes.
  2. Add the salt, baking powder, sugar and whole eggs, then mix with one hand to make a dough ball. Mix for two minutes until all combined.
  3. Flatted the dough into a rectangle. Wrap the dough in cling film and refrigerate for at least 20 minutes before using.
  4. Prepare four 10x2.5cm fluted tart moulds by brushing the inside with softened butter, dust with flour and shake off any excess—this will ensure the dough doesn’t stick to the mould after baking.
  5. Lightly flour a clean surface and, using a rolling pin, roll the dough to a 5 millimetre thickness. Cut out 4 circles of dough using a round cutter with a 13cm diameter. Place a circle over a tart mould & press in the dough lightly with your fingers, from the centre, around the base & then up the sides. Take the rolling pin and roll over the top of the mould - this will cut the top edges, giving you a clean finish. Repeat with the rest of the dough. Rest the dough in the refrigerator for 20 minutes.
  6. Preheat the oven to 170ºC/gas mark 3. Line the tart base with parchment and baking beans. Bake for about 10 to 15 minutes. (I baked mine for 25 minutes.) Allow to cool.

For the Nutella ganache:

In double boiler, combine cream and chocolate pieces, stirring constantly until dissolved and smooth. Remove from heat and stir in Nutella. Set aside.
    To assemble tarts:
    1. Spoon 1-2 tsp (depending on the size of the tart moulds) salted caramel sauce into the pre-baked tart base.
    2. Then pour or spoon the Nutella ganache onto the caramel sauce. Garnish with chopped toasted hazelnuts.
    Notes & modifications:
    1. Because of the hot weather, I made sure my butter & flour were cold before mixing. I kept my chopped butter in the freezer & the flour in the fridge before starting to mix. I used a food processor to mix my dough. It's faster than doing it with the hands, thus preventing the butter from melting in the process.
    2. I used two 10-cm heart shape, eight 8-cm round & three 6-cm round tart pans to use up all the dough.
    3. The baked tart is quite fragile, so you need to handle it very carefully when assembling the tarts. To reduce breakages, I chilled the shells first as cold tart shells are not as fragile.
    Chocolate Sable Dough recipe is by Vincent Gadan & Michelle Guberina from Homemade Pâtisserie, Pastry Made Easy.

    I'm linking this post to Cook-Your-Books event no. 16 hosted by Kitchen Flavours.
    I'm also linking this post to the Best Recipes for Everyone, September Event : Chocolate Wonderland, hostedby XuanHom's Mom Kitchen Diary.
    Related Posts Plugin for WordPress, Blogger...